Backup from Storage Snapshots using Veeam
Veeam Backup & Replication offers integration with certain storage arrays, including Nimble Storage, for VM snapshot offloading. Backup from Storage Snapshots offers optimizations to the backup process. The primary benefit for implementing Backup from Storage Snapshots is minimizing the lifetime of a VM snapshot, reducing the time for snapshot commit and I/O–reducing the impact on the production workload.
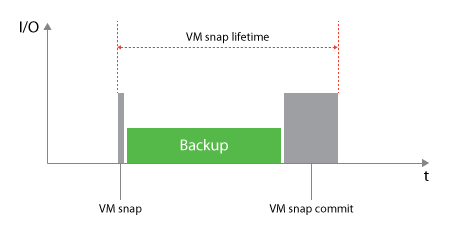
With normal vSphere Storage APIs – Data Protection (VADP) based backups, the virtual machine snapshot is created and remains open (VM snap lifetime) until the backup is completed. With large or highly transactional VMs, the long time in which the VM snap lifetime may lead to large snapshot delta files being created. When the backup is complete, the snapshot commit tasks (VM snap commit) begin combing the delta files with the VM disk files, producing high I/O on the storage until the snapshot commit is complete.
With Backup from Storage Snapshots, the VM snap lifetime is significantly reduced, greatly reducing the VM snap commit time, reducing the impact on the production systems and applications.

Images from Veeam.com (bp.veeam.expert/resource_planning/backup_from_storage_snapshots.html).
Integrating Veeam with Nimble Storage
At an infrastructure layer, the backup server must have access to the management interfaces of the storage array. All backup proxy servers must have direct access to the storage network (iSCSI, Fibre Channel, NFS). With Nimble Storage, I highly recommend using the Nimble Windows Toolkit on every Windows OSE connecting to a volume on a Nimble Storage array.
Backup server must have access to the management interfaces of the storage array. All additional prerequisites such as LUN mappings, creation of initiator groups for iSCSI, altering NFS exports and snapshot management are subsequently handled via this connection.
Backup proxy servers must be able to directly access the storage array via the same protocol used for connecting the production datastore (FibreChannel, iSCSI or NFS). As opposed to using Direct Storage Access, it is not a requirement for the proxy server to have access to the production datastore itself, as it reads data blocks directly from the cloned storage snapshot.
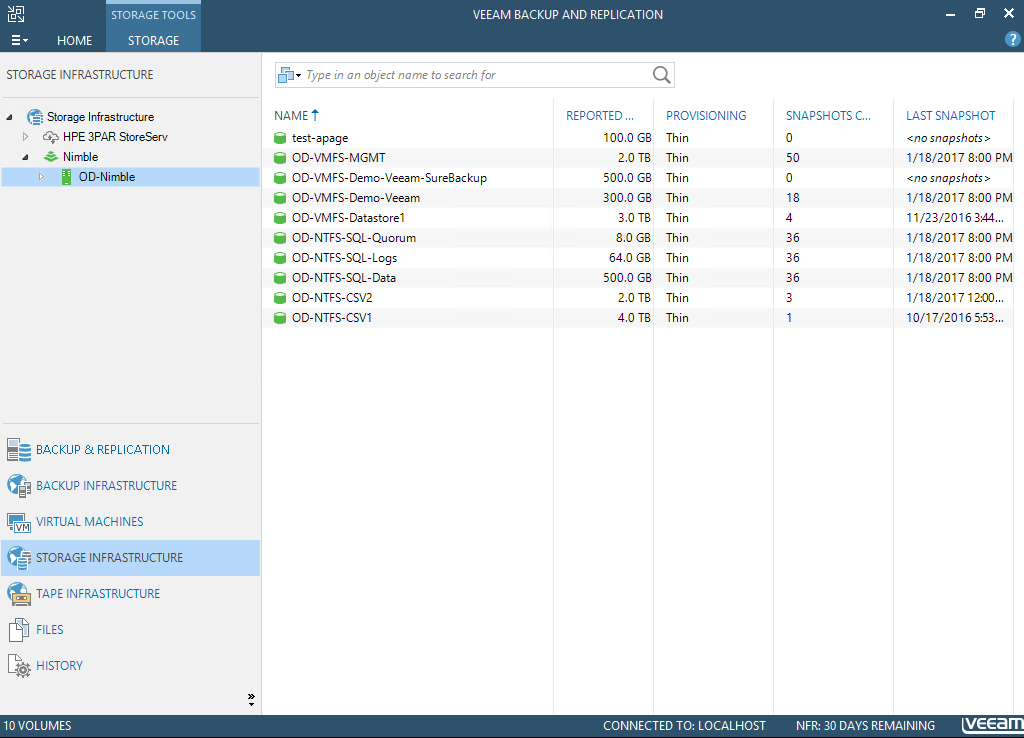
After the infrastructure requirements have been met, access the Veeam Backup and Replication Console and navigate to the Storage Infrastructure section. Click on the Add Storage object and follow the very simple wizard to provide Veeam with the appropriate details. After the integration is complete, Veeam will gather the list of volumes.
Restoring from Storage Snapshot
There are a few different paths for restoring from storage snapshots using the Veeam B&R Console. For this post I will find the desired virtual machine by selecting the appropriate storage snapshot; alternatively, we could go to the list of virtual machines, select the target virtual machine, then choose the desired storage snapshot from the list presented by the restoration wizard.
Expand the inventory tree to navigate to the target volume.
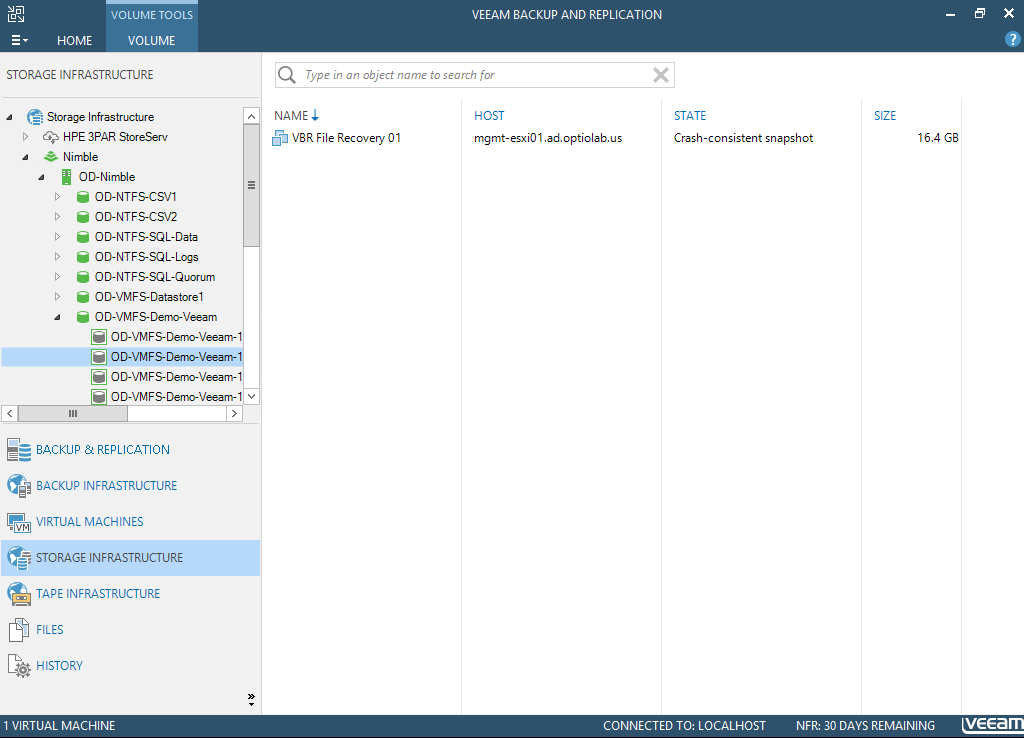
Find the target virtual machine in the list of VMs available from the selected volume. Right click on the VM to display the restoration context menu.
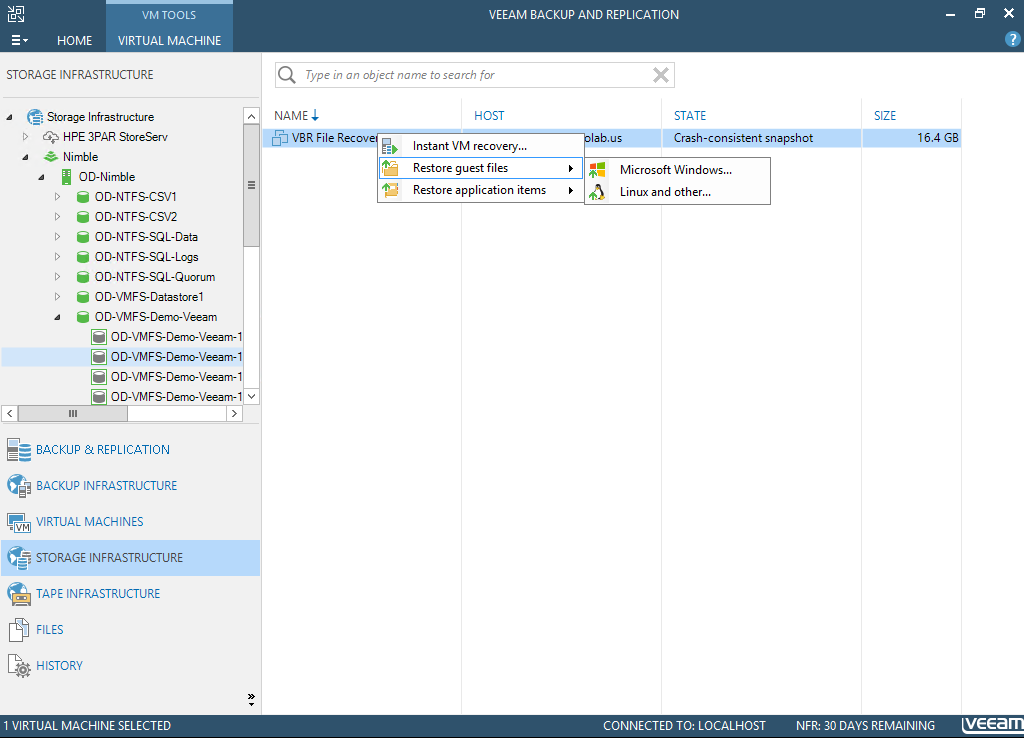
The restoration wizard will open. For this post, I will be performing a File Level restore from a storage snapshot. You can choose to place the VM in a specific folder or resource pool; however, default settings use the location of the current VM and work just fine.
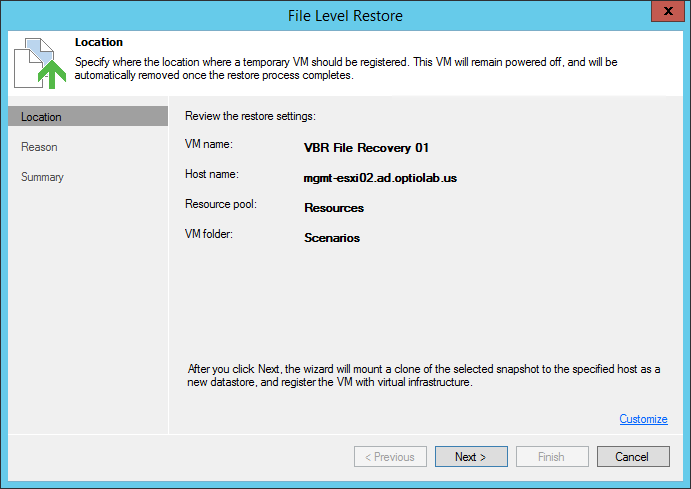
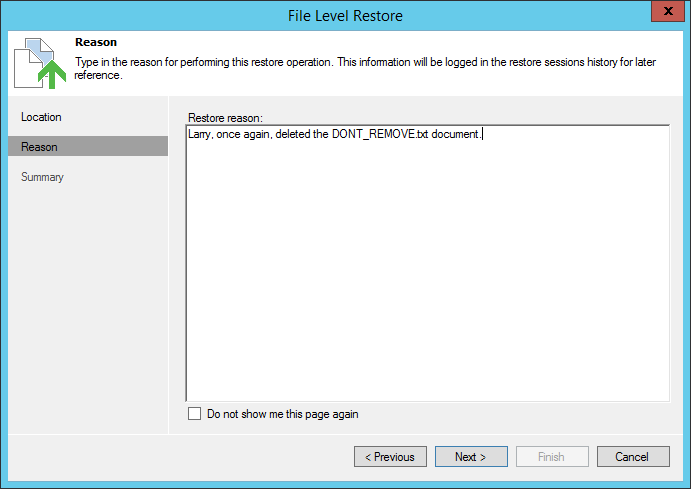
After choosing the location and resource settings for the (temporary) restored VM, enter a reason for performing the restoration then click on the Next button to continue.
Review the summary of the operation and complete the File Level Restore wizard.
A task summary window will display to monitor the process.

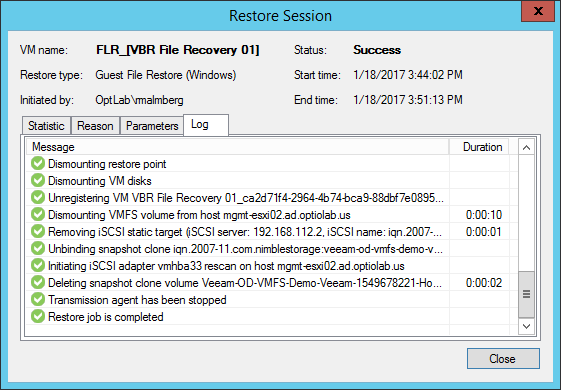
During this process, Veeam will leverage the Nimble API to automate several manual tasks, including:
- Clone snapshot as a volume
- Update volume ACL to give the host (selected during the restore wizard) access to the volume
- Rescan HBA(s) of the host
- Resignature the (new) datastore
- Add the VM into inventory
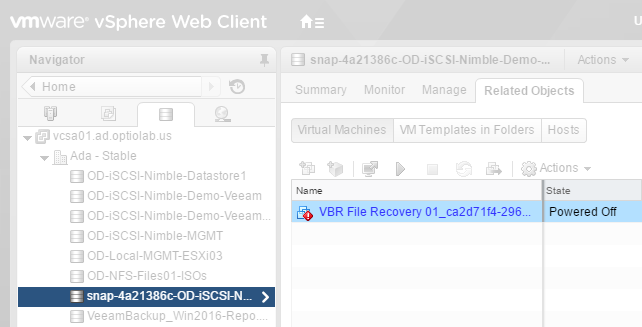
After the tasks complete, the cloned snapshot will be presented as a new datastore, and the new virtual machine will be available in vCenter inventory.
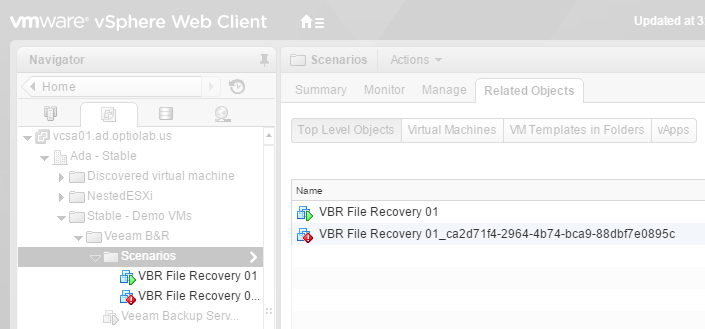
Using the default location settings, we see the original and the restored VM in the same VM folder. The original VM remains online and operational while the restored VM is offline.
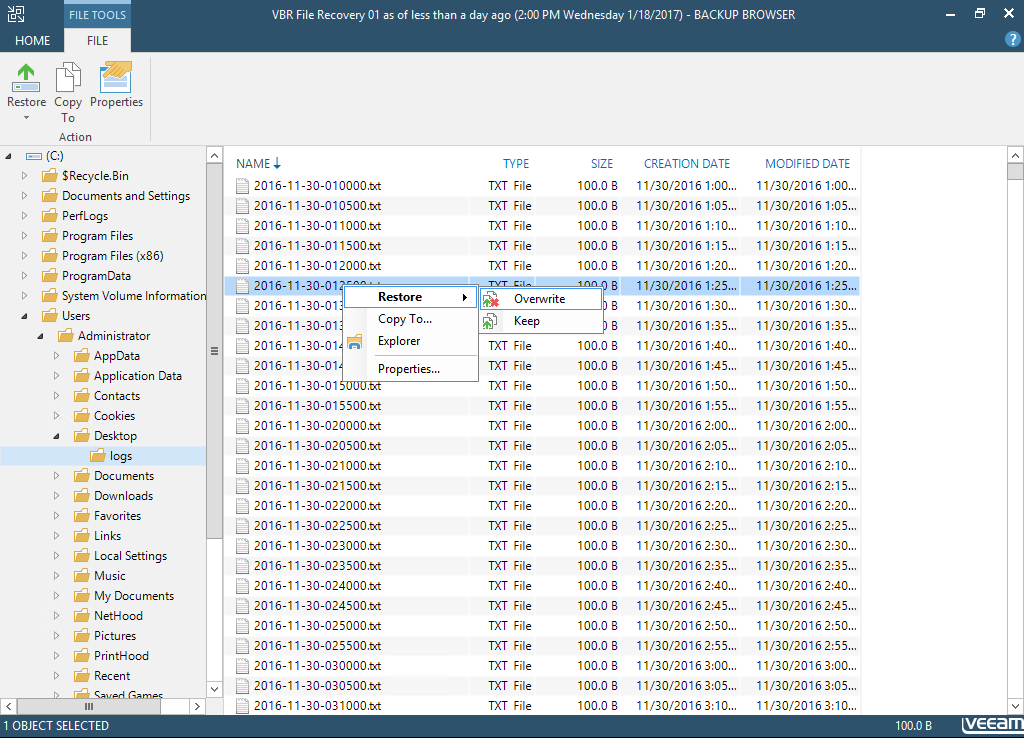
Now that we have the restored virtual machine available (but offline) in the vCenter inventory, we can begin the file restorations. The Backup Browser window opens from the Veeam Backup and Replication Console. Just like Windows Explorer, use the tree navigation to browse to the target file(s). Right click on the file to view the restoration options. Larry deleted that darn file, so this time we will just choose to restore it back to the original location by choosing Overwrite (just in case Larry attempted to create a new file).
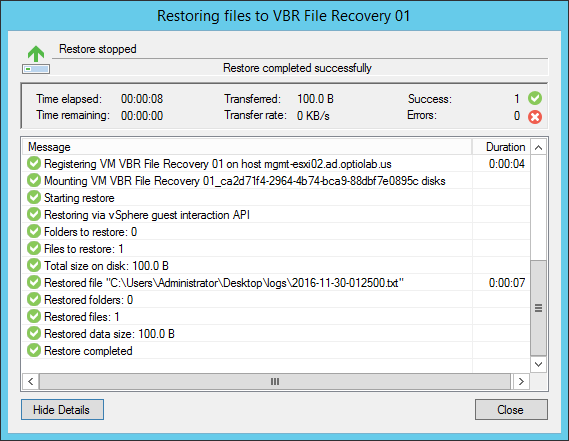
The file restoration task begins. One of the neatest things is what occurs behind the scenes … Veeam uses VMware’s vSphere guest interaction API. By leveraging this API, we can copy the data from the offline, restored VM to the online, original VM!
Clean Up from Restoration
Veeam and Nimble made the process easy by automation the backend tasks; now we will leverage that automation for the clean up of that work!
Navigate to the Backup & Replication section of the VBR Console followed by opening the list of Running jobs.
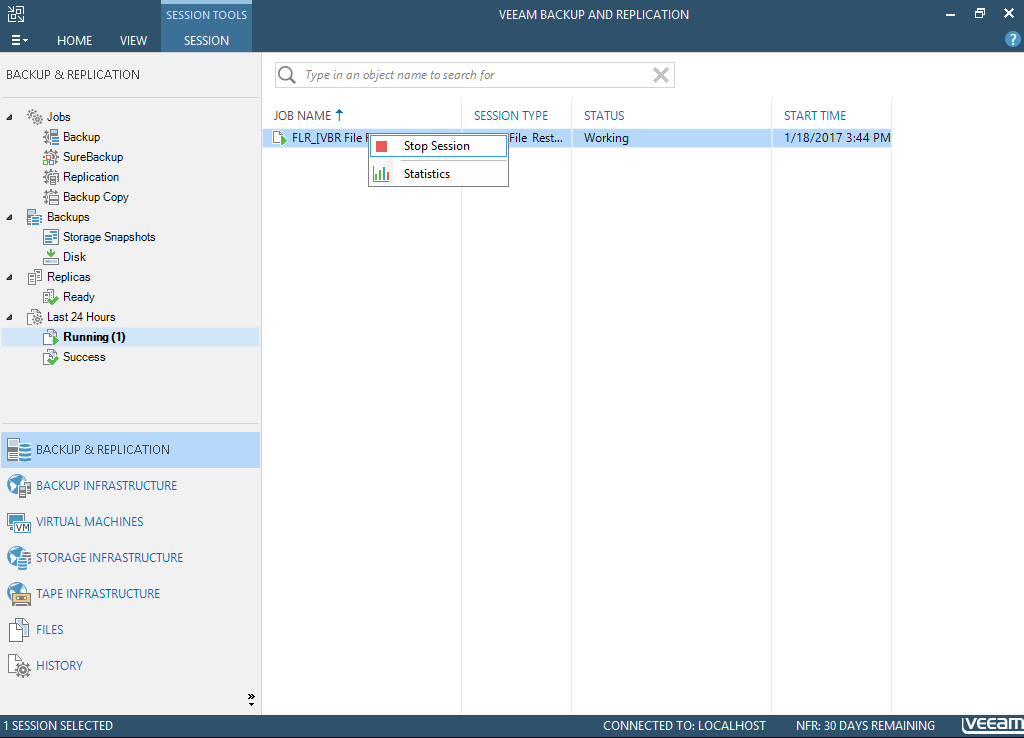
Right click on the target running job and select Stop Session. The clean up work will process and the job will be complete!
Additional Thoughts
This post focused on performing file level restores leveraging Veeam’s integration with storage snapshots. Storage snapshots can be utilized for all restore options, including full VM recovery, file level recovery, and application item recovery.
I did not show it here, but one of Nimble’s advanced integration points with Veeam Backup and Replication is that Veeam can also restore from secondary array snapshots–providing advanced restore options and disaster recovery in which we are no longer bound only by the availability and data of the primary array!
Nimble and Veeam Integration Features
Backup from Storage Snapshots
- Backup from primary storage systems
- Backup from secondary storage systems
Veeam Explorer from Storage Snapshots
- Restore from primary storage systems
- Restore from secondary storage systems
Snapshot Jobs
- Snapshot only job
- Snapshot in secondary destination job
Other Operations
- Storage rescan
- Snapshot creation and deletion

Leave a Reply